YouTube generates automatic closed captioning for most videos after uploading*. While this feature is a great starting point for ensuring that your video is accessible, it is important to review and correct any errors in the automatically-generated closed captions. The following steps will show you how to view and edit the automatic captions for your YouTube videos.
*Please note: Automatic closed captions will not be available immediately after uploading your video to YouTube. It may take several hours for the automatic closed captions to be generated.
Sign in to ()
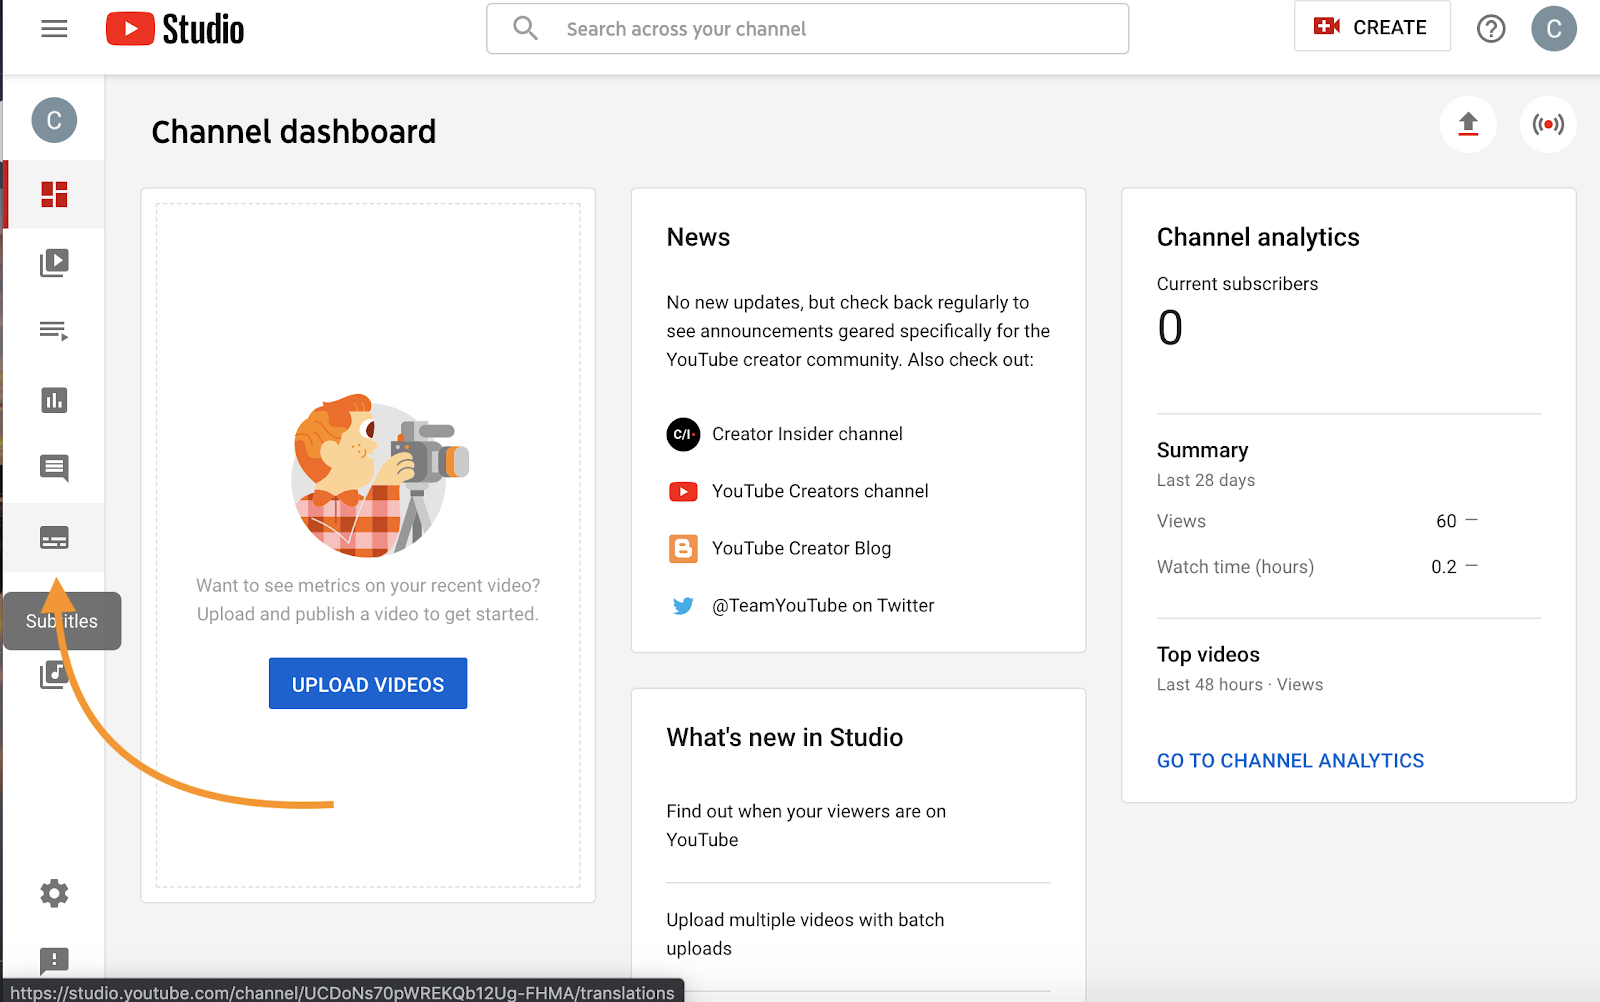
From the left menu, select 鈥淪ubtitles鈥�:
Click the video you鈥檇 like to edit.
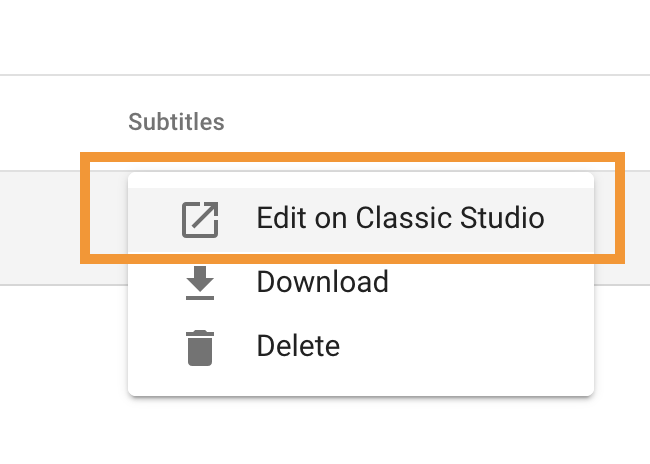
For the language you鈥檇 like to edit, in the 鈥淪ubtitles鈥� column, select Options Edit:
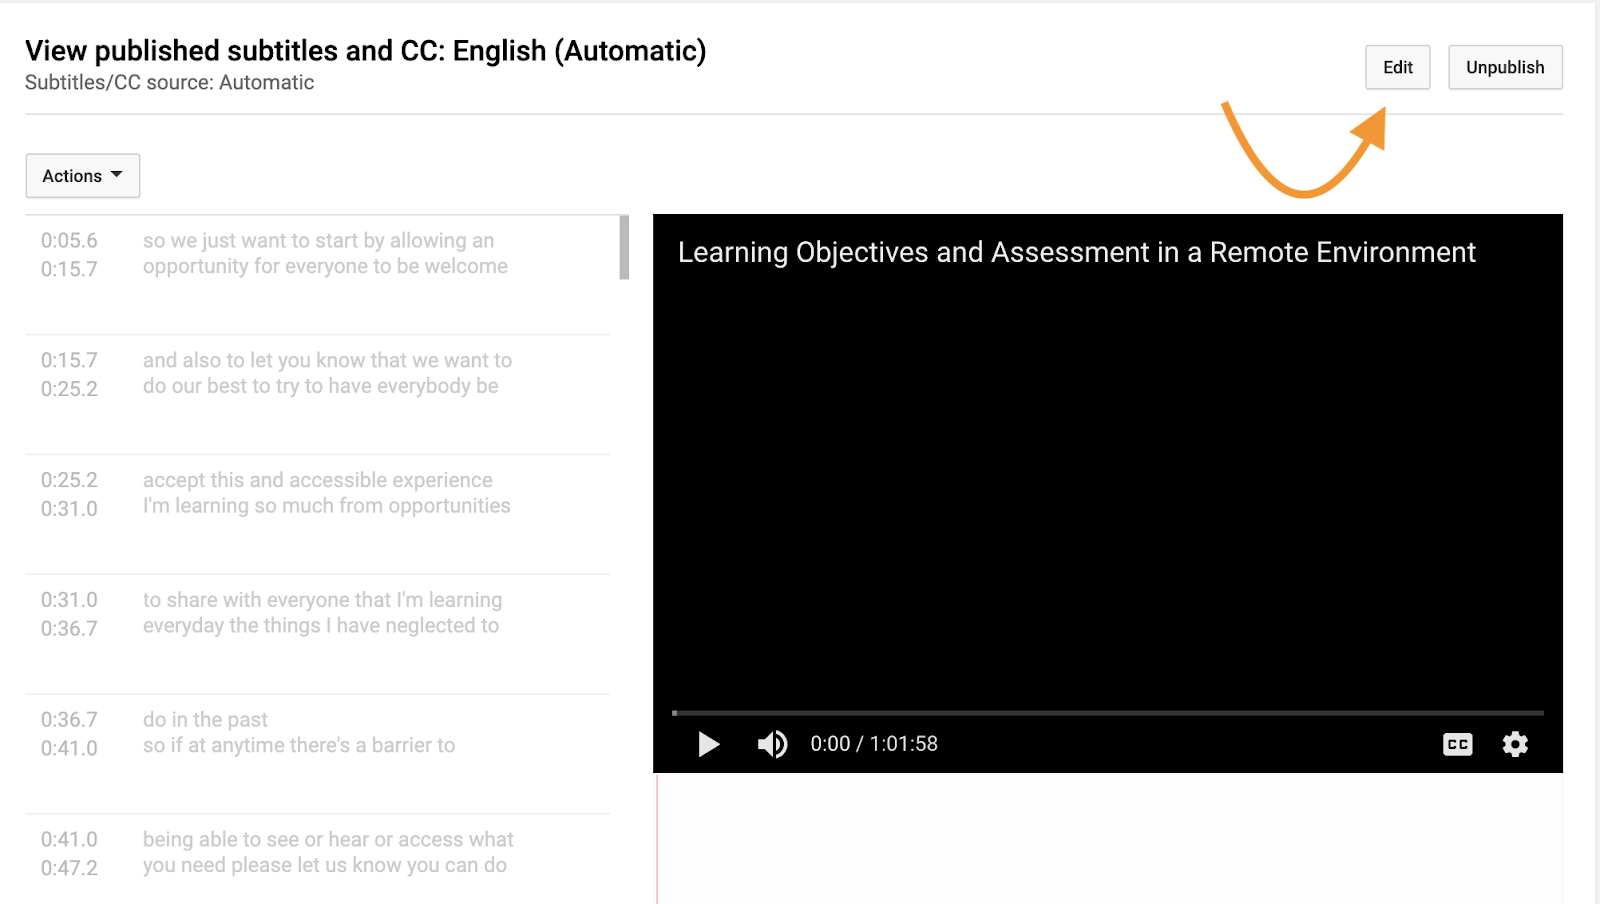
At the top right, click Edit:
Click on the caption track you want to edit.
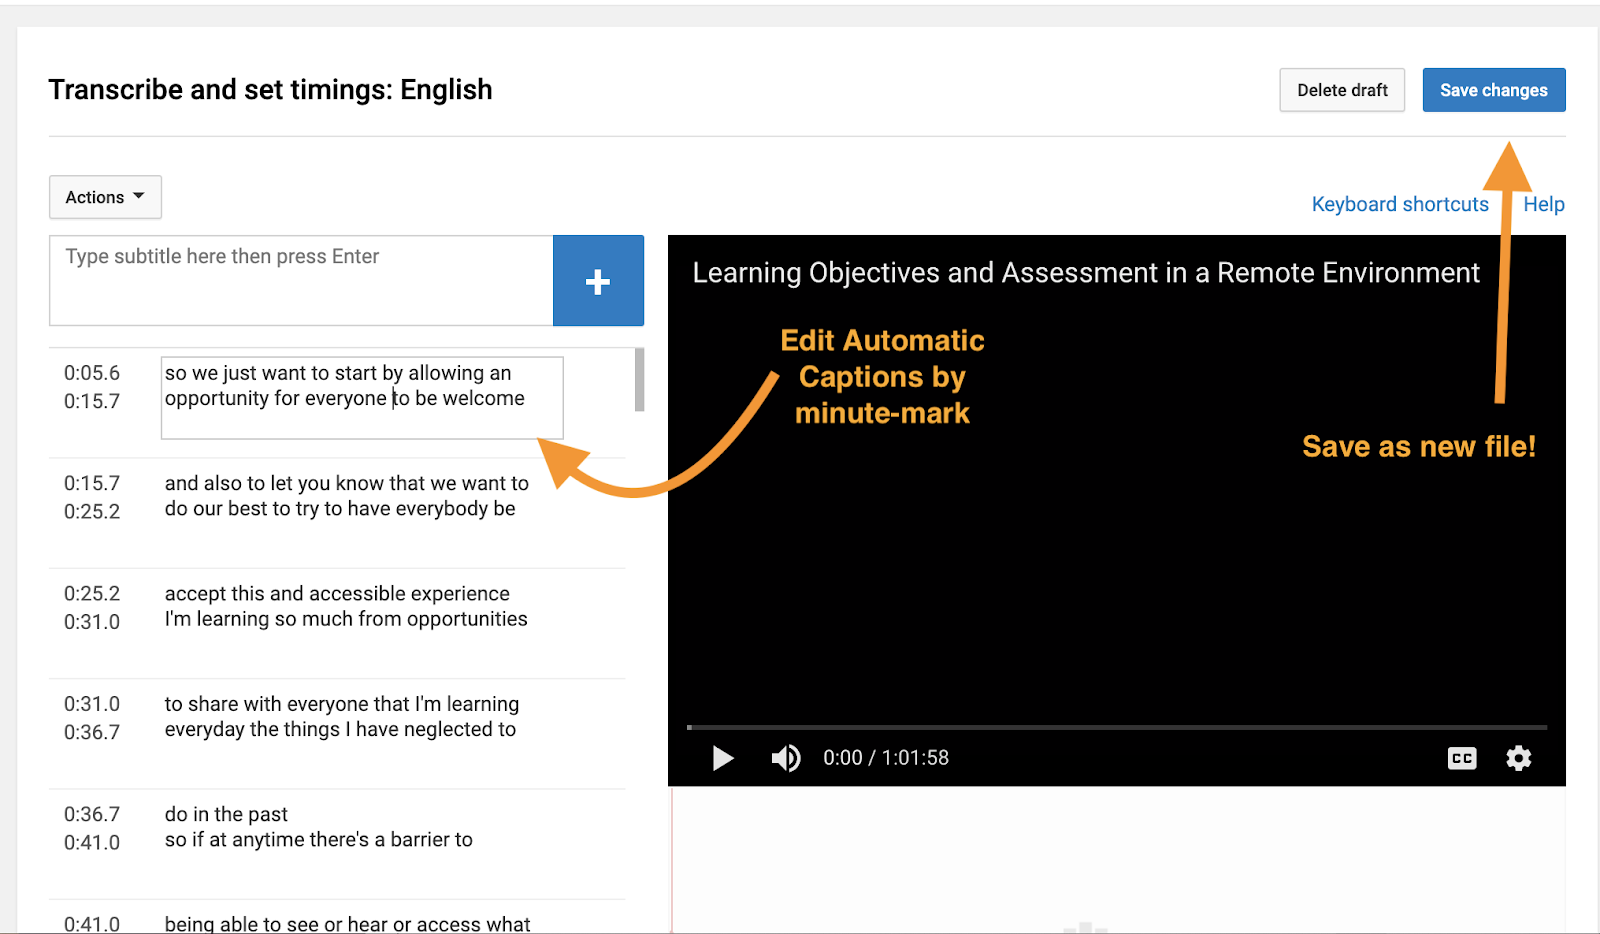
Click inside any line in the caption track panel and edit the text.
When you鈥檝e finished making changes, click Publish edits, at the top right:
You鈥檒l be asked to confirm that you want to overwrite existing subtitles. Click Publish.
Zoom
Zoom automatically transcribes the audio of all videos that you record to the cloud. The transcriptions are saved in a separate VTT file and the transcript is time stamped. Viewers have the option to view the transcript within the video itself. Users also have the option to edit the automatically generated transcript to correct any errors and ensure equal access. Please review these instructions for .
Ensemble
Ensemble Video uses speech-to-text technology to provide automatic captions for all videos you create. Once the automatic captions are generated, it is important to review and correct any errors to ensure equal access. Please review these instructions for
Additional Resources and Tutorials
Questions
Information and Library Services 207-786-6222 helpdesk@bates.edu
OR
Curricular & Research Computing mhanraha@bates.edu